


Are you looking for ways to optimize images for SEO without slowing down your website? Images can improve the look of a blog post, help explain your ideas, and make your content easier to share. But large files, vague filenames, and missing alt text can also hurt page speed and make it harder for search engines to understand your images.
In this post, I’ll show you how to choose the right image format, reduce file sizes, write helpful alt text, create SEO-friendly filenames, and use images legally. These simple updates can improve your website’s performance while giving your images a better chance of appearing in search results.
A picture is worth a thousand words.
Fred R. Barnard
Choose an SEO-Friendly Image File Name
Before uploading an image to your website, give it a clear, descriptive file name. A name like IMG_1234.jpg tells search engines nothing about the image, while a name like optimize-images-for-seo.jpg provides useful context.
Keep image file names:
- Descriptive
- Relevant to the image
- Written in lowercase
- Separated with hyphens
- Free of unnecessary numbers or symbols
Use your primary keyword only when it accurately describes the image. Do not force keywords into every file name.
For example:
Bad file name:
IMG_4827.jpg
Better file name:
optimize-images-for-seo.jpg
A descriptive file name will not improve rankings by itself, but it is one part of helping search engines understand your image and the page where it appears. The image itself should also support the post and feel connected to your website, something I learned while developing the featured-image style for my website.
Compress Your Images Before Uploading
Large image files can slow down your website, especially when a page contains several photos, graphics, or infographics. Slower pages can frustrate readers and make it harder for them to enjoy your content.
Compressing an image reduces its file size while keeping the quality as close to the original as possible. The goal is not to make the image blurry. It is to remove unnecessary file weight so the page loads more efficiently.
You can compress images with:
- Online image-compression tools
- WordPress image-optimization plugins
- Design programs such as Canva or Adobe Express
- Plugins that automatically convert images to WebP
Before uploading an image, compare the compressed version with the original. Make sure any text remains readable and the important details are still clear.
Quality matters because blog images help shape a reader’s first impression, but the file should not be larger than necessary. Finding the right balance between appearance and performance is an important part of how you optimize images for SEO.
Selecting the Correct File Type for Your Images
The file type you choose affects both image quality and file size. Using the wrong format can make an image unnecessarily large or cause it to lose important details.
The most common image formats are:
- JPEG: Best for photographs and detailed images with many colors. JPEG files usually provide good quality at a smaller file size.
- PNG: Best for graphics, logos, screenshots, and images that need a transparent background. PNG files often look sharper but can be much larger than JPEGs.
- WebP: A strong choice for most website images because it can provide good quality at a smaller file size than JPEG or PNG.
- GIF: Best reserved for simple animations. GIFs are usually not the right choice for standard blog images.
For most blog posts, WebP or JPEG will be the best option. PNG still makes sense when you need transparency or very sharp text and graphics.
The best format also depends on the kind of visual you are creating. A photograph, infographic, Pinterest pin, and blog featured image may each need a different balance of quality and file size. That is one reason choosing the right blog image matters before you even begin optimizing it.
Do not convert an image simply because one file type sounds more modern. Compare the quality and file size, then choose the format that gives you the best-looking image without adding unnecessary weight to the page. Selecting the right format is another practical way to optimize images for SEO.
Write Helpful Image Alt Text
Alt text is a short description added to an image in WordPress. Its main purpose is accessibility. Screen readers use alt text to describe an image to people who cannot see it, and search engines can also use it to understand what the image shows.
Good alt text should describe the image clearly and explain its purpose on the page. It should sound natural, not like a list of keywords.
For example, imagine a blog image showing someone editing a photo on a desktop computer.
Weak alt text:
image SEO keyword blog photo
Better alt text:
Photographer editing a food image on a desktop computer before uploading it to a blog.
The better version explains what is visible without stuffing the description with keywords.
When writing alt text:
- Describe the important subject of the image
- Keep the description clear and concise
- Include the primary keyword only when it fits naturally
- Do not begin with “image of” or “picture of”
- Do not copy the image caption word for word
- Leave the alt field empty when an image is purely decorative
Helpful alt text improves accessibility first, while also giving search engines more context. That makes it an important step when you optimize images for SEO.
Use Image Captions When They Add Value
An image caption is the text that appears directly beneath an image. Unlike alt text, captions are visible to everyone reading the post.
Captions can help readers understand why an image is included, explain something that may not be obvious, identify a person or place, or connect the visual to the point being discussed.
A useful caption might:
- Explain what the reader should notice
- Add context that is not already clear
- Credit the photographer or image source when needed
- Include a short takeaway related to the section
- Encourage the reader to look more closely at the image
For example, the caption beneath an image-editing workspace could say:
Choosing the right image file type helps balance image quality, file size, and website performance.
That tells readers why the image matters instead of simply repeating what they can already see.
Do not add a caption just to include another keyword. Some images, especially decorative images or simple illustrations, do not need one. When a caption adds useful context, however, it can improve readability and help connect the image to the surrounding content.
Captions do not replace alt text. Alt text supports accessibility and helps describe the image, while captions provide visible context for the reader. Using each one for its proper purpose is another small way to optimize images for SEO.
Make Sure Your Images Work on Mobile Devices
More people read blog posts on phones and tablets, so your images need to resize correctly on smaller screens. A responsive image adjusts to the width of the device without stretching, overflowing the page, or forcing readers to scroll sideways.
Most modern WordPress themes handle responsive images automatically, but it is still worth checking each post on both desktop and mobile.
Look for problems such as:
- Images extending beyond the screen
- Text inside graphics becoming too small to read
- Important details being cropped
- Large images taking too long to load
- Captions breaking awkwardly on smaller screens
The dimensions you choose also matter. A wide featured image may look good on a desktop but lose its impact when reduced to phone size. Infographics and images with a lot of text may need larger lettering and a simpler layout so readers can still understand them.
Before publishing, preview the post on a mobile device or use the mobile preview inside WordPress. Make sure each image is clear, readable, and properly aligned.
Responsive design supports both usability and performance. When images display well on every screen, readers are more likely to stay on the page and engage with the content. That makes mobile testing another important step when you optimize images for SEO.
Here is a quick checklist you can use before uploading images to your blog.
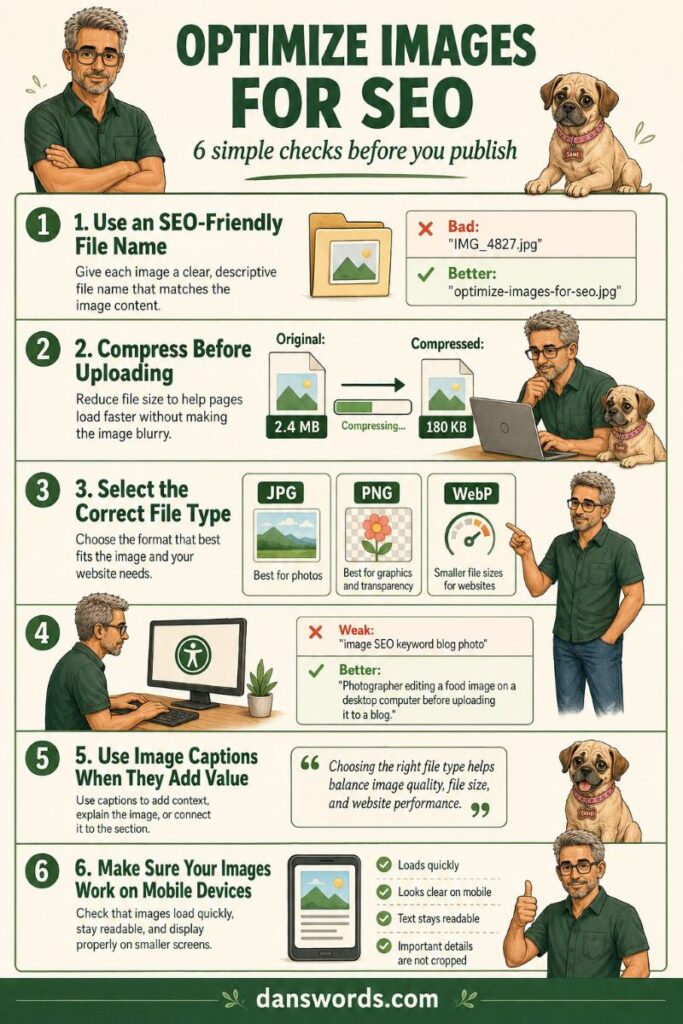
Following these six checks can help your images load faster, support accessibility, and work better across your website.
Let’s Wrap This Up: Optimize Images for SEO
In thisYou do not need complicated tools or advanced technical skills to optimize images for SEO. A few thoughtful steps can make your website faster, easier to use, and more accessible.
Before uploading an image, choose a descriptive file name, select the right format, and reduce the file size without ruining the quality. Add helpful alt text, use captions only when they add context, and check that every image still looks good on a phone.
None of these steps will improve rankings on their own. Together, however, they help search engines understand your images and give readers a better experience.
Images should support your content, not slow it down or distract from it. Take a few extra minutes before publishing, and your website will be better for it.
Keep Creating After 50
I hope you found this post useful. If you are a Silver Creator building a blog or creating content after 50, these posts can help you keep moving forward:
- Starting a Blog After 50: How to Share Your Experience Online
- How to Repurpose Blog Content for Social Media as a Silver Creator
- Content Creation Over 50: The Complete Beginner’s Guide
Whether you are starting from scratch, improving an older website, or finding new ways to share what you know, you do not have to figure everything out at once. Start with the next useful step and build from there.

About the Author: Dan Swords
Dan Swords is a writer, blogger, and content creator with more than 35 years of professional technical writing experience and over 13 years creating content for the web. Through danswords.com, he shares practical advice to help aspiring bloggers and creators get their ideas online. His focus is simple: helping people start and grow a blog with clear writing, engaging content, and practical strategies that actually work.